


Your AirPods suddenly won't connect to your iPhone, Android or computer anymore? Millions of users worldwide know this problem – and the good news is: in over 90% of cases the problem can be solved within a few minutes. We'll show you the most effective solutions, sorted by frequency and success rate.
The key points at a glance:
- A Bluetooth reset solves 90% of all connection problems – simply turn it off and back on
- At 58%, battery problems are the most common source of faults in wireless headphones
- Factory reset as the ultimate solution when nothing else helps
- Single AirPods can be replaced more cheaply than buying a complete set
- Firmware updates take at least 30 minutes and require special conditions
Instant help: the 5 most common causes when AirPods won't connect
Before you try complicated solutions, let's start with the quick wins. These five steps fix most connection problems within two minutes.
Diagnosing Bluetooth problems correctly
The first and most important step: Turn Bluetooth on your iPhone or smartphone off completely and wait 10 seconds. Then turn it back on. Sounds simple, but it works in the vast majority of cases.
In your device's Bluetooth menu, check whether the AirPods show up in the list at all. If they do, tap the "i" icon and choose "Forget This Device". After that you can reconnect them. Also test whether other Bluetooth devices work – that way you'll find out whether the problem lies with the AirPods or with your device.

Our tip:
Checking battery status and charge level
At 58%, battery problems are the most common cause of failure in wireless headphones – compared with only 19% for driver problems. Your AirPods need at least 10% battery charge to connect.
Put both AirPods in the charging case for at least 30 seconds and close the lid. The LED status light gives you important clues:
- Green: Fully charged
- Amber: Charging
- Flashing white: Ready to pair
- Flashing amber: Error – reset required
Carefully clean the charging contacts in the case with a dry cotton swab. Dirt and oxidation are often hidden connection killers. Lithium-ion batteries lose about 20% of their capacity per year with daily use – after 300-500 charge cycles, capacity drops to 80%.
AirPods won't connect to iPhone: the complete solution
iPhone users actually have an advantage: the seamless integration into the Apple system. But this very integration can sometimes cause problems.
First check your iOS version under Settings > General > Software Update. For AirPods Pro 2 you need at least iOS 16; for AirPods 3, iOS 15.1 is enough. An outdated operating system is often the cause of connection problems.
Connection problems are often caused by incorrect settings or software glitches that require a factory reset. This erases all saved data and allows a fresh connection.
Resetting network settings (without losing data)
Network settings can interfere with Bluetooth connections and require a reset to clear conflicts. Here's how to proceed:
1. Open Settings > General > Transfer or Reset iPhone
2. Tap "Reset" > "Reset Network Settings"
3. Enter your passcode and confirm
What gets reset:
- All Wi-Fi passwords (write them down beforehand!)
- Bluetooth connections
- VPN settings
What is kept:
- All apps and data
- Photos, videos, contacts
- Apple ID and iCloud data
After the restart, you'll need to reconnect to your Wi-Fi and pair the AirPods again. This solves connection problems in 80% of cases.
Removing AirPods from iCloud and pairing them again
iCloud sync is actually handy – your AirPods automatically connect to all your Apple devices. Sometimes, though, it leads to problems.
Here's how to remove the AirPods completely from your Apple account:
1. Open the Find My app on your iPhone
2. Select the "Devices" tab at the bottom
3. Tap your AirPods
4. Scroll down and choose "Remove This Device"
5. Go to Settings > Bluetooth
6. Tap the "i" next to the AirPods
7. Choose "Forget This Device"
Now the AirPods are completely removed from your system. Open the charging case next to your iPhone and follow the pairing instructions on the screen.
Connecting AirPods to Android: troubleshooting
AirPods also work with Android – but not as smoothly as with Apple devices. The most common problems and their solutions:
Existing connections between your AirPods and Apple devices can prevent your AirPods from connecting to your Android devices. Make sure the AirPods are disconnected from all nearby Apple devices.
Understanding the compatibility limits: Android doesn't support all AirPods features. You lose automatic device switching, Siri integration, the battery level display (without an extra app) and firmware updates.

Our tip:
Clearing the Bluetooth cache on Android
Here's how to clear the Bluetooth cache (varies by manufacturer):
Samsung Galaxy:
1. Settings > Apps
2. Three dots at the top right > "Show system apps"
3. Search for "Bluetooth"
4. Tap "Storage" > "Clear cache"
Google Pixel:
1. Settings > System > Advanced
2. Reset options > Reset Wi-Fi, mobile & Bluetooth
General method via the developer options
First enable the developer options by tapping the build number seven times. Then go to the developer options under Networking and enable the Bluetooth HCI snoop log. Then restart and disable the log again afterwards. After clearing the cache, you need to pair the AirPods again. To do this, press and hold the setup button on the charging case until the LED flashes white.
Windows 10/11: fixing AirPods connection problems
Windows users often find that AirPods don't show up in the device search. The solution usually lies in the Bluetooth drivers.
Bluetooth driver problems are the main cause of Windows connection errors. Here's how to update the drivers:
1. Right-click the Start button > Device Manager
2. Expand "Bluetooth"
3. Right-click your Bluetooth adapter
4. "Update driver" > "Search automatically for drivers"
If that doesn't help, try rolling back the driver or download the latest driver directly from the manufacturer (Intel, Realtek, Broadcom). Disabling Swift Pair can also help: go to Settings, then Devices, then Bluetooth & other devices, and turn off the option "Show notifications to connect using Swift Pair". The Windows Bluetooth troubleshooter often finds hidden problems: open Settings, go to Update & Security and then to Troubleshoot.
Mac & MacBook: fixing AirPods connection errors
Outdated macOS versions cause AirPods compatibility problems, as Apple regularly releases firmware updates.
Check your macOS version: Apple menu > About This Mac.
For optimal compatibility you should use at least macOS Monterey (12.0), ideally Ventura or Sonoma.
After running for a long time with frequent connection changes, the Mac's Bluetooth module can become buggy and needs a reset.
Performing an NVRAM/PRAM reset:
1. Shut down the Mac
2. Turn it on and immediately press Cmd + Option + P + R
3. Hold for about 20 seconds
4. Release when the startup chime sounds twice (or the Apple logo appears twice)
Also check Audio MIDI Setup:
- Applications > Utilities > Audio MIDI Setup
- Make sure the AirPods are configured as the output device
Only one AirPod connects: special solutions
If only the left or right AirPod works, there is often a specific problem. The stereo balance may be off, or the firmware versions don't match. To check the stereo balance on the iPhone, go to Settings, then Accessibility, then Audio/Visual, and set the balance slider to the middle.
To reset a single AirPod, put only the problematic AirPod in the case and hold the setup button for 15 seconds until the LED flashes amber and then white. Then insert both AirPods and pair them again from scratch.
Sometimes the AirPods have different firmware versions. Check this under Settings, then Bluetooth: tap the "i" next to your AirPods and look at the firmware version. If the versions differ, put both AirPods in the case, connect it to power and leave them next to your iPhone for 30 minutes.
Replacing a single AirPod at OneEarPod
At OneEarPod you get original Apple AirPods individually – much cheaper than at Apple. Simply check your model number (Settings > Bluetooth > "i"), choose left or right in the shop and order only the AirPod you need!
Compatibility is guaranteed – you just need to make sure you select the right model. You'll find the serial number on the charging case or in the iOS settings.
Resetting AirPods completely: the ultimate reset
If nothing else helps, a complete factory reset is the solution. This process erases all saved settings and connections. A reset is necessary if the AirPods no longer connect to any device, audio dropouts occur despite a full battery, one AirPod permanently doesn't work, or problems persist after a failed firmware update.
Step-by-step reset guide:
1. Put both AirPods in the charging case
2. Close the lid and wait 30 seconds
3. Open the lid
4. Press and hold the setup button on the back
5. After 15 seconds: the LED flashes amber, then white
6. Let go – the AirPods have been reset
The reset deletes all device connections, personalised settings and touch gesture configurations. However, the firmware version, serial number and warranty status are retained.
After the reset you need to pair the AirPods again. To do this, hold them with the case open next to your iPhone – the pairing animation appears automatically.
Dirt & dust: hidden connection killers
Dirt and debris can block sensors and charging contacts, which prevents proper detection and connection.
Regular cleaning every 2-3 weeks can prevent connection problems and maintain optimal performance – especially important for heavy users.
Cleaning the charging contacts:
1. Use a dry cotton swab
2. Dip it lightly in isopropyl alcohol (70%)
3. Carefully clean the metal contacts in the case
4. Wipe the contacts on the AirPods
5. Let everything dry for at least 5 minutes
The sensors in the case detect whether the AirPods are inserted. Dust can interfere with this detection. Blow gently into the case (but not if it's damp!), use compressed air spray from a distance of 30 centimetres, or clean your case with a dry microfibre cloth.
The speaker mesh easily gets clogged with earwax. Use a soft toothbrush and only brush in one direction. Don't use water or cleaning agents.
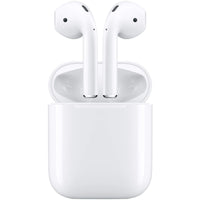
Our tip:
Forcing a firmware update: an insider tip for stubborn problems
Firmware updates require special conditions and at least 30 minutes. They are installed automatically while the AirPods are charging and within Bluetooth range of an Apple device connected to Wi-Fi.
Current firmware versions (as of 2024):
- AirPods Pro 2: 6A301
- AirPods 3: 5E135
- AirPods Pro: 5E133
- AirPods 2: 3E751
How to check the firmware:
iPhone: Settings > Bluetooth > "i" next to AirPods
Mac: System Settings > Bluetooth > AirPods > Options
Triggering the update manually:
1. Connect the AirPods to your iPhone/iPad
2. Use them for music for 30 seconds
3. Put both in the case and close it
4. Connect the case to the charging cable
5. Place the iPhone right next to it
6. Let the setup run overnight
If the firmware update fails, Apple recommends resetting the AirPods and trying again. There are no sounds or notifications to indicate completion.
Beta profiles can be unstable. Only install them if you like to experiment. Downgrading is not possible!
Conclusion: AirPods can often be reconnected with easy tricks
It doesn't always work, we know that, but very often problems with AirPods can be solved with one of our tips. Try the different approaches before you buy new AirPods straight away – it saves money and protects the environment!
